
So, you want to grow a vegetable garden? You’ve been thinking about it for a while, and between the COVID-19 quarantine and the weather turning warmer – well, this year just might be the right time to do it! Who knows what’s going to be with the food supply, and, hey, you might even save some money growing your own! Not to mention that it’s something that can be done while maintaining social distancing and is certainly a wholesome outdoor activity with the kids. I can just picture the scene (as the kids are handed the shovels): “Okay, kids, here ya’ go! It’s time to dig some holes and plant these seeds so that we can have some really great vegetables this summer!”
I’m just fooling around here, but it’s just good-natured ribbing. I do think that making a vegetable garden is a wonderful thing to do – with your kids (or grandkids) or even without them. Who doesn’t want to adorn their table with a home-grown and fresh-picked tomato (or pepper, cucumber, lettuce, squash, etc.)? You just can’t compare their taste and quality with produce that comes from the store. And shouldn’t your kids know that vegetables don’t originate in the store but, rather, from seeds planted and grown in the good earth, the ultimate source of the blessings Hashem has bestowed upon us?
I’ve been vegetable gardening for the past 50 years or so (if you do the math, you’ll see that I really am that old!), and, b”H, I’ve had a lot of success in this endeavor. Every year, the child in me still marvels at the miracle of a seed sprouting from fresh soil. I still get excited about the prospect of getting things started in the springtime and watching as the garden takes shape throughout the growing season.
Yet creating a successful garden requires some preliminaries. Although I usually start planning in the winter, it’s not too late to begin now, in early May. Let’s think in concrete terms. What do you have to do? What’s there to think about?
THE RIGHT PLACE FOR YOUR GARDEN
All vegetable plants require direct sunlight for proper growth: the more sun, the better. How much sunlight do your plants need each day? With only six hours, they will grow but not produce much; with eight hours, they will do much better; with 10 to 12 hours, they will be very happy; and anything over 12, they will shteig! If there’s no sun, there’s no growth; there’s no way getting around this simple fact.
Here in Baltimore, the southern exposure usually gets the most sunlight. If part of your backyard has a southern exposure and is open to the sky, you’ve got a good potential spot. However, if it is always in shade due to surrounding trees, it’s not a good spot. If your front yard is sunny and faces the south, don’t automatically discount it; many successful vegetable gardens have been planted in front yards!
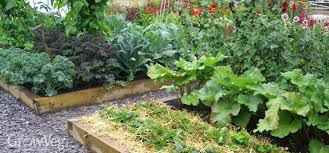
Next, your garden area must have good water drainage. If rainwater accumulates and doesn’t drain away, that place is not good for your garden. Although all plants must have water to grow, if their roots sit for extended periods in standing water, they will drown or get sick and die! Well-aerated soil that retains moisture but is not waterlogged makes the best garden bed for your vegetable plants. (If your plot has water drainage problems, it is possible to build a raised garden bed, but constructing one is beyond the scope of this article.)
THE RIGHT SIZE FOR YOUR GARDEN
The bigger the garden, the more time and energy it’s going to take to prepare and maintain. While I’d like to allay your fears, pat you on your proverbial back, and tell you that growing you own vegetables is really fun – a piece of cake! – unfortunately, it’s not. The simple truth is that your vegetable plants are not going to take care of themselves! Successful gardens produce vegetables only when there is a dedicated gardener taking care of business, because here, as in everything else we do, mipum tza’ara agrah, according to the effort is the reward.
So, before we address how big your garden should be, let’s address the elephant in the room: Do you like the idea of getting out there and growing your own vegetables (and all the work that it entails), or do you just like the idea of eating garden-fresh vegetables? To me, there is almost no greater earthy thrill than planting seeds or plants and seeing them miraculously grow before my eyes in a wondrous display of nifla’os haBorei – even though it takes a lot of time and effort. For me, all the work put into the garden is a big part of the “fun,” that is, the joy of growing your own. How about you? Do you think it will be fun, or just a big chore that you didn’t really sign up for? Before proceeding, try to honestly answer this question.
Okay, you’ve decided to forge ahead and plant your very first vegetable garden (despite my ominous words to the wise). Mazal tov! The next big question is how big should you make it? For beginners, I’d suggest a plot not bigger than about 6x6 feet. That’s 36 square feet.
Why so “small”? Well, first of all, it’s not that small. You’ll be able to get a variety of popular vegetables and still give each plant enough space. A well-tended and well-planned smaller garden plot will give you more vegetables than a large neglected one. Also, for the first-time gardener, there is plenty to do to prepare and maintain this plot of land. For instance, if you’re converting grass turf into a garden, it will be a lot of work. (More on preparing the garden bed below.)
If you already have a garden bed from previous endeavors, or you’ve got gardening experience preparing and maintaining a larger plot, by all means make it bigger. If it’s done right, the bigger the plot, the bigger the crop (at least in theory). The total area of my various garden plots is close to 1,000 square feet, and I do get a lot of vegetables (and flowers) throughout the spring/summer/fall from that land! But, I wouldn’t dream of doing all this as a beginning gardener.
Now we’ve covered the important preliminaries and have answered some questions regarding your making the greatest garden in the world! (Okay, maybe just the greatest garden on your block – or, at least, on your property!) Now, I will talk about preparing the garden bed and getting started with the main purpose of the entire activity – getting your plants into the ground.
PREPARING THE GARDEN BED
You’ve decided to make a vegetable garden, and you’ve thought seriously about the best spot and the right size for you. Now what? In order to make your vegetable plants happy, you must make a nice bed for them. You can be pretty sure that your plants will not be happy if their bed is not made right!
A nice garden bed for your vegetable plants (and all plants, for that matter) is one in which the soil is loosened so that the roots can stretch and grow outwards and downwards, anchoring the mother plant above and picking up water and vital nutrients along the way. Seeds or plants placed into hard, compacted soil will be retarded in their growth and will never reach their full potential – even if you talk to them every day and shower them with the freshest water available! Making this garden bed is the most difficult and time-consuming part of a successful garden and will take hard work to achieve. (I warned you!) However, it is the most necessary and critical step in the entire process. Just how does one go about making a comfy garden bed for your precious plants and seedlings?
DIGGING THE EARTH
Whether you’re starting a virgin garden bed where grass turf is now growing or reworking a previous bed, the objectives are the same: 1) to dig and loosen the soil to a depth of at least 6 inches, 2) to break up the soil into the smallest bits possible, 3) to get rid of rocks and stones (discarded into the proverbial “rock pile”), and 4) to break up or eliminate weeds. (The definition of a weed is anything that you don’t want growing in your garden!) No matter how you slice and dice it, this is a tough job and will take stamina, determination, muscle power – and the right tools – to get the job done. If you don’t do the job yourself but hire a gardener instead, it will only take money (as well as some knowledgeable oversight).
Tool of choice: a garden tiller. The best way to dig up your soil is by using a garden tiller (see photos). This is a great gardening tool that is somewhat comparable to a gasoline-powered lawn mower. Instead of cutting the grass, the machine has tines that rotate and dig up the soil. A good tiller is worth its weight in gold when it comes to preparing the garden bed. If you need to destroy grass turf, you will need a powerful tiller that tears apart the grass and mixes it with pieces of earth from below. (A lightweight machine will not get the job done.) My relatively new Cub Cadet garden tiller is a powerful machine that eats up the earth and crumbles it into what my grandson calls “coffee grounds”!
Use the tiller to dig down to a depth of at least 6 inches. (Eight to 10 inches is even better.) With grass turf, it’s a good idea to till twice, in order to avoid leaving large clumps of either grass or soil. Although a tutorial on how to work a tiller is beyond the scope of this article, if you put your mind to it, you can learn to do it. (YouTube has demonstrations.) If you’re serious about this garden thing, you might consider buying your own tiller. Alternatively, you can rent (Home Depot) or borrow one. Or (as mentioned above) hire a gardener to do it for you. Using a tiller to dig up the earth is, hands down, the tool of choice and will save you much time and labor.
Manual tools: forks and shovels. For many, many years, when I was much younger, I didn’t have access to a tiller (although I might rent one for a day to do new or very large areas). So I dug up my garden plots the old-fashioned way using a garden fork and/or a garden shovel (see photo). Those tools work fine as long as you have the internal “horsepower” to wield them. Once again, I do not recommend using these tools to turn over virgin grass turf. Even in an already-used garden bed, you will work much harder and longer using these manual tools than if you used a tiller, and the ground will also not be chopped as fine. For small garden plots or for confined areas (where the tiller doesn’t fit), however, these are the tools of choice.
Using garden forks and shovels is pretty intuitive: You position the tool over the ground, push down hard with your foot on the fork or shovel, push down with your hand on the handle, and lift up the earth. Take bigger or smaller “bites” depending on how hard the soil is and how strong you happen to be! Once you’ve lifted a clod of earth, use the sides of the tool to chop it into smaller and smaller pieces (starting to feel those muscles building up, are ya?). Hafach ba vehafach bah (keep turning it over) until you’ve achieved little bits and pieces of earth. No need to go to the gym today; you’ve already had your workout!
IMPORTANT ADVICE BEFORE YOU START
Okay, you’ve got the tools, the time, and the space, and you’re psyched and ready to go! Before you start, here’s some more important information to keep in mind:
Getting outfitted for your gardening foray: Whether tilling or hand-turning the soil, you will need a good pair of garden gloves to protect your hands and prevent an unwanted crop of painful blisters that often appear after unprotected handling of gardening tools. Long pants are recommended to protect your legs from debris that might scatter while tilling (or mowing or weed-wacking). They will also protect your knees when you have occasion to kneel on any outdoor surface. Wear a hat and/or a sweatband to protect yourself from the sun and keep the sweat from dripping into your eyes. (I get a bunch of sweatbands from Modell Sports at the outset of every gardening season.) Finally, tillers can be noisy, so I always use earplugs – not necessary if you’re using a garden fork or shovel (unless you have very noisy neighbors…).
Only work the soil when conditions are right: This is an important tip that will make a big difference in whether (or not) you will succeed in digging up your garden bed: Don’t work the soil when it’s too wet, and don’t work the soil when it’s too dry. If the soil is too wet, it will be very difficult (if not impossible) to break down the clods of earth. All you’ll have is wet earth sticking in muddy clumps to your tiller tines, your fork, your shovel – and you! If the soil is too dry, it will feel like cement; trying to dig up this hardened soil and break it into little pieces is backbreaking and time-consuming, even if you’re using anything but the most powerful tiller.
After a wet spell, wait a few days for the soil to dry out before attempting your garden turnover. After a dry spell, give the ground a good soaking (use a sprinkler or wait for some rain), and then let it dry out a bit. When the soil consistency is “just right” (that is, not too dry and not too wet), it’s actually a pleasure to work (well, relatively speaking). When you become a gardener, you’ll always keep your eye on the weather!
Stay safe! No one is immune from the effects of overexposure to the sun. Wear a hat, sweatband, and use sunscreen, especially at the beginning of the gardening season, to prevent sunburn. Be safe and don’t be sorry – avoid sunburn! Plan your gardening excursion with forethought – especially early in the season when your skin has not built up pigmentation (a tan) to somewhat block the effects of UV radiation. Working outside earlier and/or later in the day may be wiser than working under the full blast of a midday sun. (On the flip side of the coin, don’t work outside if there’s thunder/lightening, no matter how pressed you are to get your seeds/seedlings planted!)
Stay hydrated! Drink lots of water and never work in your garden without a water bottle at your side. It doesn’t have to be a commercial bottle of water; I use a one-liter plastic seltzer bottle that I keep refilling with ice water from the house. On a hot day, when I’m working many hours with the soil and/or plants, I can drink up to two or three liters when outside and another liter (or two) during the evening! Do not skimp on drinking water! If you ignore this basic need, you may, chas veshalom, become dehydrated or have sunstroke – both of which are extremely dangerous. Keep your body well-hydrated and don’t worry about drinking too much; your body will take care of the excess. If you feel tired or too hot, stop working and go inside for a break until your body has cooled down.
Do not exercise beyond your limits! We all tend to think that we can do more than we’re actually able to do, especially if you love being in the garden – a world unto itself – and you’ve got plants ready to go into the ground or maintenance or cultivating work to do. It’s easy to overextend your physical limits, and, believe me, you will feel it the next day. Even if you’re young(er), you can still pull a muscle or twist something the wrong way. And if you’re older and have had a sedentary winter inside, you’ve really got to pace yourself when it comes to doing the physical work of gardening. This is especially true when it comes to digging the garden bed. So, please be careful and stay within your limits! As the season progresses, you will build more and more stamina as you get into better shape.
Be careful with power equipment! Never, ever try to clean off the tines of your tiller when the motor is running, even if just in idle mode – not with your hand and not with your foot. The reason is obvious, and the limb you save may be your own. If the neighborhood kids come around to see you tilling, keep them at a safe distance and never let them stand in front of the tiller while you’re digging, lest the tiller get away from you by accident (it happens). Wear safety goggles when necessary.
ADDING INGREDIENTS TO YOUR NEWLY TURNED SOIL
We haven’t talked much about soil composition, and this topic deserves an article in itself. However, here are some things which I highly recommend you add to the soil at this stage:
Peat moss: Most of the soil composition in this area (especially virgin soil) has a lot of clay in it. Clay is rich in nutrients (the good news) but very tough to break apart and hard on roots (the bad news). Adding two- to three-cubic feet of peat moss to your new garden of 36 square feet will help to break up the clay as well as add a lot of nutrients to the soil at the same time. Distribute the moss evenly over the garden surface before tilling/digging.
Humus and compost: Termed “brown gold,” your plants will love this! If you have your own compost, sprinkle it over your newly-turned earth. Home Depot has bags of Humus & Compost (Scott) for only about three dollars per bag. One bag of this per 36 square feet will yield high dividends. Distribute evenly over the garden surface before tilling/digging.
Fertilizer: Garden fertilizers come in bags with numbers on them: a good general vegetable fertilizer, which I use, has the numbers “10-10-10.” That stands for 10% nitrogen (N – for leaf development and vivid green color); 10% phosphorous (P – for root growth); and 10% potassium (K – sometimes called potash, for root development and disease resistance). The other 70% is inert filler material. The addition of these nutrients to your soil will make your plants happy. Use a cup to sprinkle the granules over your garden surface (like sprinkles on top of a cake) before tilling/digging.
Pulverized lime: Most soils in this region have a low pH (acidic), and most vegetables like to grow in soil with a pH 7 or slightly over (alkaline). The pulverized lime will do the trick. Use a cup to sprinkle the granules over the garden surface before tilling/digging.
If you don’t add these ingredients to the soil, you can still plant; but I can guarantee your plants will grow bigger and better if you take the time to improve your soil now.
The last step before planting: Use a dirt rake to smooth out the newly tilled soil. This will prevent the formation of gullies and the pooling of water when it rains or after watering.
WHAT YOU CAN PLANT NOW
The next article in this series about vegetable gardening will cover planting both seeds and seedlings into your new garden bed. However, since it’s getting “late” in the season, let me give you a heads-up on what you can plant in your garden right now, in early May:
You can sow the seeds of radish, lettuce, and chard (cold weather crops) directly into your garden bed.
And you can plant seeds of tomato, pepper, eggplant, cantaloupe, and cucumber (hot weather crops) into planting trays. Place these trays in a warm, sunny area to encourage germination and growth. After six to eight weeks, these plants will be ready to plant outdoors (when they are six to eight inches tall). If you don’t have seeds for these hot weather crops, you can buy them as small plants (either at Home Depot or at Valley View Farms) during the month of May and plant them outdoors after Memorial Day (May 30).
Avraham Cohen is a teacher and freelance artist living in Baltimore, Maryland. He is an avid gardener and delights in the miracles of garden growth.